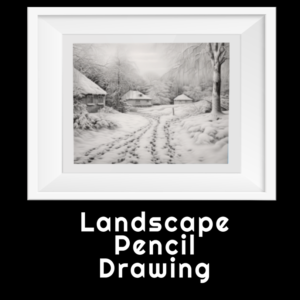
Master the Art of Landscape Pencil Drawing: A Step-by-Step Guide
Introduction:
Landscape pencil drawing is a captivating art form that allows you to capture the beauty of nature and create breathtaking scenes on paper. Whether you’re a beginner or an experienced artist looking to enhance your skills, this step-by-step guide will take you on a journey to mastering the art of landscape pencil drawing. In this article, we’ll explore essential tips, techniques, and a comprehensive guide to help you create stunning landscape drawings with your trusty pencil.
Tips for Landscape Pencil Drawing
Preparing Your Materials:
Before diving into the world of landscape pencil drawing, ensure you have the right materials at hand. Here’s what you’ll need:
Quality pencils: Invest in a range of graphite pencils, including varying degrees of hardness (ranging from 2H to 6B), to achieve different levels of shading and texture.
Paper: Choose a sturdy, acid-free paper suitable for pencil drawing. Opt for a heavier weight paper to prevent smudging and allow for multiple layers of shading.
Erasers and sharpeners: Have a good quality kneaded eraser, a fine eraser, and a sharpener to keep your pencils in optimal condition.
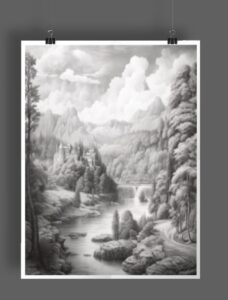
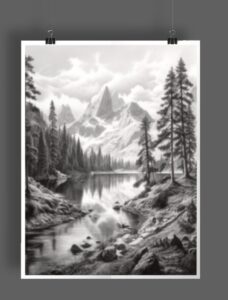
Choosing Your Landscape and Reference Image: Selecting a captivating landscape as your subject is crucial. Look for reference images that inspire you and reflect the mood and atmosphere you wish to convey in your drawing. Research different landscapes, such as serene mountains, captivating seascapes, or tranquil forests, to find the perfect source of inspiration.

Sketching the Basic Shapes:
Begin by lightly sketching the basic shapes and outlines of the landscape elements. Focus on the major components such as mountains, trees, bodies of water, and any other prominent features. Keep the lines loose and fluid, using light pressure to ensure easy erasing if necessary.
Adding Depth with Shading:
To bring your landscape to life, master the art of shading. Start by identifying the primary light source in your reference image. Apply lighter pencil strokes to areas directly hit by light, gradually transitioning to darker strokes for areas in shadow. Experiment with different pencil pressures and blending techniques to achieve smooth transitions and realistic textures.
Creating Texture and Detail:
To add texture and detail to your landscape, pay attention to smaller elements such as foliage, rocks, and textures on the ground. Use various pencil strokes, such as cross-hatching, stippling, or hatching, to create realistic textures. Practice layering different pencil grades to enhance depth and texture in your drawings.
Perfecting Perspective and Composition:
Consider the principles of perspective and composition to create a visually pleasing landscape drawing. Incorporate elements such as leading lines, foreground, middle ground, and background to add depth and guide the viewer’s eye through the drawing. Experiment with different angles and viewpoints to add interest and dynamism to your composition.
Refining and Adding Final Touches:
As you near completion, step back and evaluate your drawing as a whole. Make any necessary adjustments to ensure harmony and balance. Refine the details, add highlights, and make subtle tweaks to enhance the overall impact of your landscape.
When drawing landscape designs with pencil, a good choice for pencil hardness would be a range of pencils varying from 2H to 2B or 4B. Here’s why:
- 2H Pencil: The 2H pencil has a harder graphite lead, making it ideal for sketching the basic outlines and lightly shading lighter areas in your landscape. It allows you to create faint lines that can be easily erased or blended without leaving too much visible graphite residue.
- HB Pencil: The HB pencil is the standard medium-hardness pencil, offering a good balance between light and dark shading. It is versatile and can be used for general sketching, adding mid-tones, and refining details in your landscape drawings.
- 2B Pencil: The 2B pencil has a softer lead, allowing for richer, darker tones. It is excellent for adding depth and shading to areas that require more contrast, such as shadows, trees, or dense foliage in your landscape. The 2B pencil is also useful for creating textures and capturing the finer details.
- 4B Pencil: The 4B pencil has an even softer lead, producing deeper, darker tones. It is ideal for creating strong contrasts, emphasizing shadows, and adding dramatic effects to your landscape drawings. The 4B pencil is great for rendering textures like rough bark, rocks, or creating atmospheric effects in skies or water.
To become great at pencil drawing, here are some key practices and techniques you can focus on:
- Consistent Practice: Dedicate regular time to practice your pencil drawing skills. Like any craft, consistent practice is crucial for improvement. Set aside specific time slots in your schedule, whether it’s daily or weekly, and commit to honing your skills.
- Fundamentals: Master the fundamental techniques of pencil drawing. Start with basic shapes and lines, practicing their proportions, angles, and placement. Develop your understanding of perspective, composition, shading, and texture. Building a strong foundation in these fundamentals will elevate your overall drawing ability.
- Observation: Train yourself to observe the world around you keenly. Study the details of objects, people, and landscapes, paying attention to the play of light and shadow, textures, and proportions. Develop your ability to see and capture these elements in your drawings.
- Sketching: Carry a sketchbook with you wherever you go and make it a habit to sketch whenever you have a few spare moments. Practice capturing quick impressions of people, objects, and scenes. Sketching helps improve your observation skills, hand-eye coordination, and ability to capture the essence of a subject with minimal strokes.
- Study References: Study and use reference materials to expand your visual vocabulary. Analyze photographs, artwork, and nature itself to understand the intricacies of form, light, and texture. Use references as a guide to practice specific subjects or styles, while also developing your unique artistic voice.
- Experimentation: Don’t be afraid to step out of your comfort zone and try new techniques, styles, or subjects. Explore different pencil grades, mark-making techniques, and approaches to composition. Push your boundaries and embrace experimentation as it helps you grow as an artist.
- Seek Feedback and Learn from Others: Join art communities, classes, or online platforms where you can share your work and receive constructive feedback. Engage with fellow artists, attend workshops, and study the works of accomplished pencil artists. Learning from others and incorporating feedback can accelerate your growth and inspire new ideas.
- Patience and Persistence: Developing your artistic skills takes time and patience. It’s essential to persevere through challenges and setbacks. Embrace the process, celebrate small victories, and maintain a positive mindset. Remember, every drawing is an opportunity to learn and improve.
By incorporating these practices into your journey, you’ll gradually develop the skills and techniques needed to become great at pencil drawing. Embrace the joy of the process, stay persistent, and let your passion for art guide you toward continuous improvement.
By using a range of pencil hardness, you can achieve a wide variety of tones, textures, and depths in your landscape designs. Remember, experimenting with different pencil grades will help you discover the right combination that suits your artistic style and brings out the desired effects in your landscapes.

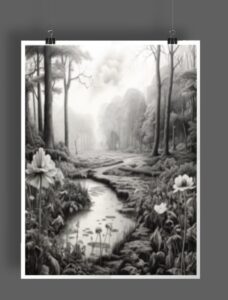
Nature Pencil Drawing
A nature pencil drawing is a artistic representation of natural subject such as landscapes, plants, animals, and other elements found in the natural world. These drawings capture the beauty, textures, and intricacies of nature using pencils as the primary medium.
To create a nature pencil drawing, follow these steps:
- Select Your Subject: Choose a specific aspect of nature that inspires you. It could be a serene landscape, a delicate flower, a majestic animal, or any other natural element that catches your attention. Consider studying reference photos or observing the subject directly to understand its unique features.
- Gather Reference Materials: Collect reference materials such as photographs, books, or images from reputable sources that showcase your chosen subject. These references will help you understand the forms, proportions, and details you want to capture in your drawing.
- Sketch the Basic Shapes: Begin by sketching the basic shapes and outlines of your subject lightly. Pay attention to proportions and overall composition. Use light pencil strokes or guidelines to map out the major features and establish the placement of objects within the composition.
- Add Details and Textures: Once you have the basic framework in place, start adding details and textures. Observe the specific characteristics of your subject, such as the texture of tree bark, the patterns on flower petals, or the feathers on a bird. Use various pencil strokes, such as hatching, cross-hatching, or stippling, to create texture and convey the natural elements realistically.
- Use Shading and Tonal Values: Incorporate shading techniques to create depth and dimension in your drawing. Observe the play of light and shadow on your subject and replicate those tonal values in your drawing. Gradually build up the values from light to dark, using different pencil grades and blending techniques to achieve a smooth transition.
- Pay Attention to Composition: Consider the composition of your drawing. Think about how you want to position your subject within the frame and how the surrounding elements can enhance the overall visual impact. Use principles of composition, such as leading lines, rule of thirds, or balance, to create a harmonious and visually engaging composition.
- Refine and Evaluate: Step back from your drawing periodically to evaluate your progress. Assess the proportions, details, and overall impact of your artwork. Make any necessary adjustments or refinements to ensure accuracy and aesthetic appeal.
- Final Touches: Once you are satisfied with the drawing, make any final adjustments or additions to enhance its visual impact. Add highlights, accentuate details, and refine any areas that require further attention.
Conclusion
Remember, creating nature pencil drawings requires practice, patience, and observation. Embrace the beauty of nature and let your pencil capture its essence on paper. Keep exploring different subjects, experimenting with techniques, and allowing your own artistic style to develop.
With the right techniques, practice, and dedication, landscape pencil drawing can become a rewarding artistic endeavor. Follow this step-by-step guide, experiment with different landscapes, and let your imagination take flight. Remember, practice makes perfect, so keep honing your skills and watch as your landscape drawings evolve into stunning works of art.
Start your journey into the enchanting world of landscape pencil drawing today and experience the joy of creating captivating landscapes with the simple stroke of a pencil!